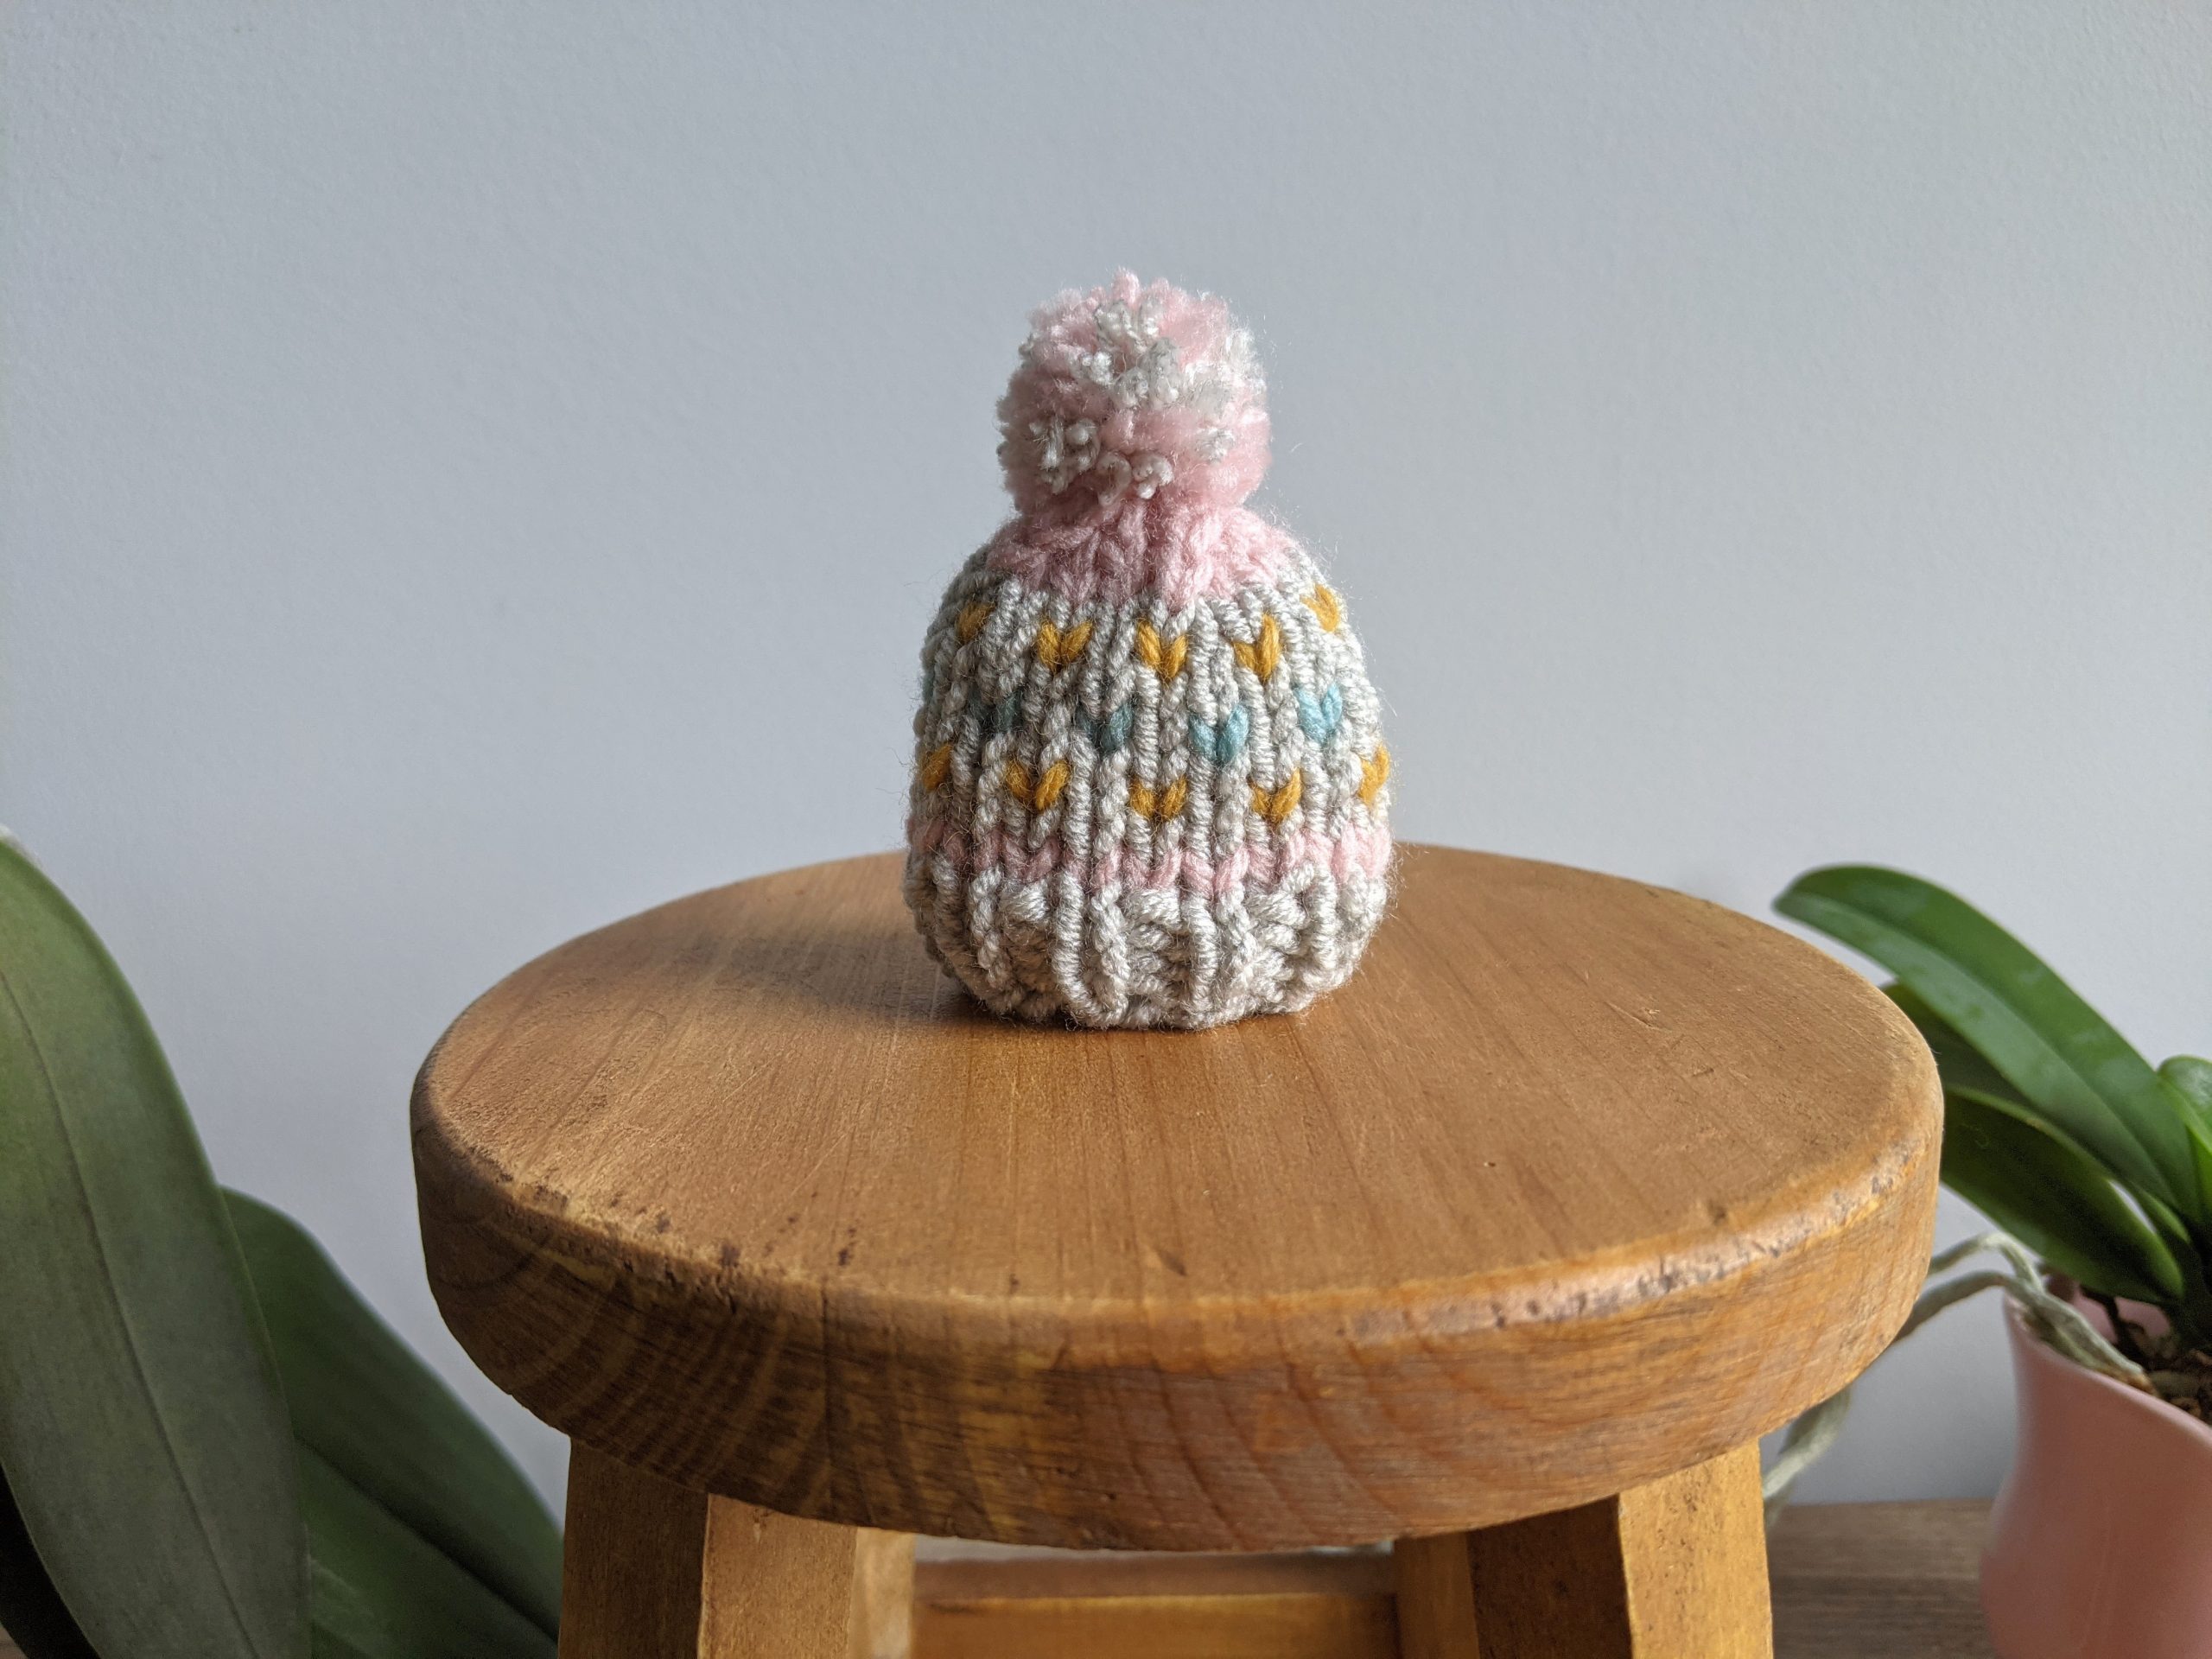
FAIR ISLE TEENIE BEANIE
DESCRIPTION
Here's a fun twist to my simple teenie beanie pattern. It's the same pattern but with color changes to make a simple fair isle design that really elevates the look!
DIFFICULTY LEVEL
This is an advanced beginner pattern. Besides the basic knit and purl stitch, you'll need to know how to knit in the round with double-pointed needles, decrease by knitting two stiches together, make a pom pom, and do simple stranded color change.
GAUGE
Gauge is not critical for this pattern. If you want a larger beanie, you can use a bulkier-weight yarn or a larger needle size. For a smaller beanie, you can use a lighter-weight yarn or smaller needle size. My final measurements are 3" x 2.5" (7.62cm x 6.35cm).
MATERIALS
ABBREVIATIONS
K = Knit
P = Purl
K2tog = Knit 2 together
CO = Cast On
St(s) = Stitch(es)
Rep = Repeat
MC = Main color
CC = Contrast color
THE PATTERN
Below is the free pattern for my fair isle teenie beanie! If you prefer a written pattern with step-by-step pictures as a downloadable PDF, you can add it to your cart HERE
You can also purchase it on Ravelry or at my Etsy shop.
SETUP
On double-pointed needles, CO 20 sts with MC and divide amongst three needles (6 sts on one needle, and 7 sts on the other two).
Make sure your stitches aren’t twisted and join in the round. You can use any technique you would like for this step, but I prefer an invisible join.
Add a stitch market to mark the beginning of the round.
BRIM & BODY
Rows 1-4: In MC, K1, P1 to end of row.
Row 5: In CC1, K all sts.
Row 6: In MC, K all sts.
Row 7: *K1 in MC, K1 in CC2*; rep from * to end.
Row 8: In MC, K all sts.
Row 9: *K1 in CC3, K1 in MC*; rep from * to end.
Row 10: In MC, K all sts.
Row 11: Rep Row 7.
Row 12: In MC, K all sts.
SHAPING THE CROWN
Row 13: In CC1, *K3, K2ttog*; rep from * to end. You will have 16 sts.
Row 14: *K2, K2tog*; rep from * to end (12 sts).
Row 15: *K1, K2tog; rep from * to end (8 sts).
Row 16: K2tog until end of row (4 sts).
FINISHING
Cut the yarn, leaving a 6-in (15cm) tail. Use your tapestry needle to thread the tail through the remaining sts. Pull the yarn tight and weave in tail to secure.
Weave in and trim all ends.
MAKING THE POM POM
With CC1, cut a 6-in (15cm) piece of scrap yarn and set aside for later use.
Holding MC and CC1 strands together, insert the end into the middle space of your fork. Begin wrapping around the end to keep it in place. You will wrap the yarn around the fork 17 times. Cut the yarn.
Grab your scrap piece of yarn and thread it in the middle space of your fork. Tie the yarn around the wrapped yarn and double knot as tight as you humanly can to prevent the pom pom from falling apart or creating a line.
Carefully pull the bundle off of the fork. Cut the loops and trim the pom pom into a tiny spherical shape.
Attach it to the top of your teenie beanie by pulling one of the ends through a hole at the top of the hat and the other end through a separate hole. You don’t want to pull both ends through the same hole. Secure with a double knot.
Tip: A small pom pom is harder to work with than a larger size. Make your knots as tight as possible.